- View Demo – Password: abc
- See full version here.
Description: adding a simple sidebar to individual blog post

#1. Install Code
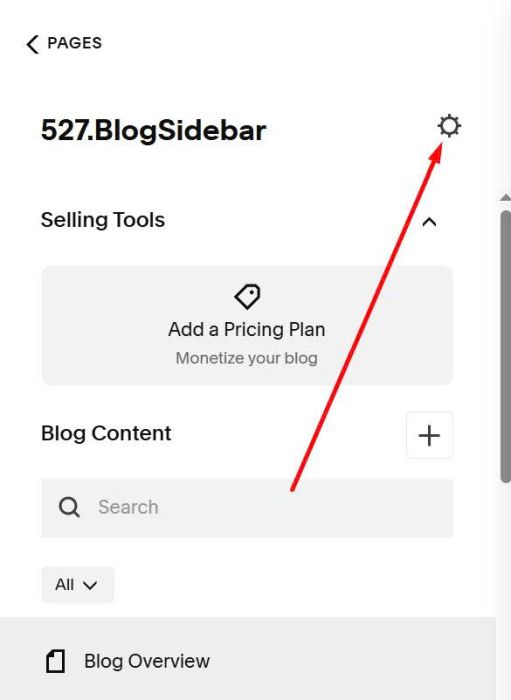
Click Gear icon on Blog Page
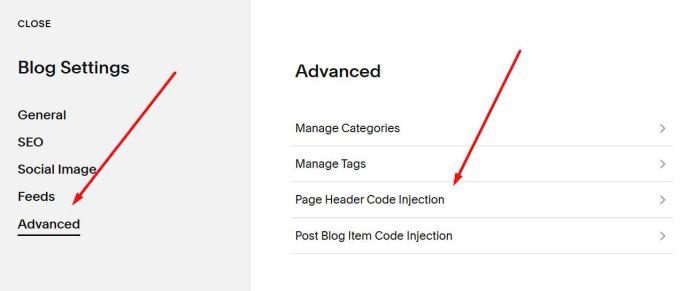
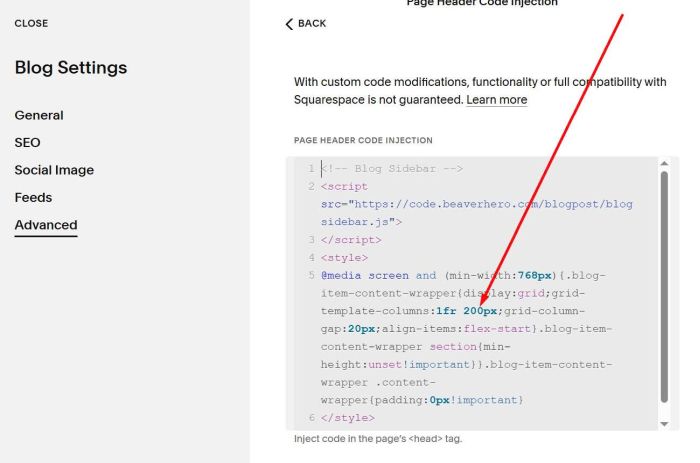
Click Advanced > Page Header Code Injection
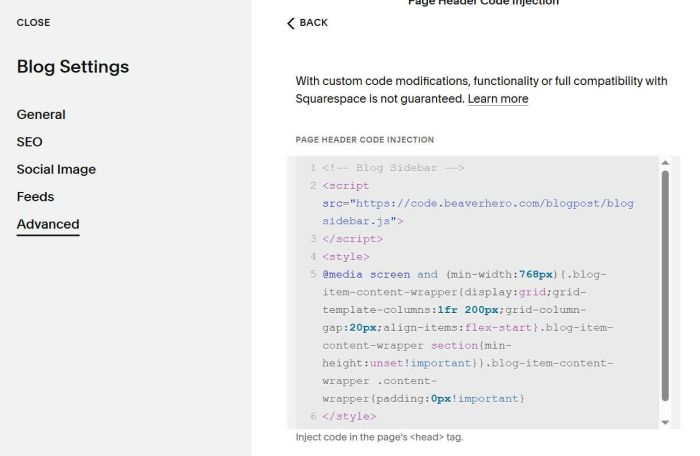
Paste this code
<!-- Blog Sidebar -->
<script src="https://code.beaverhero.com/blogpost/blogsidebar.js">
</script>
<style>
@media screen and (min-width:768px){.blog-item-content-wrapper{display:grid;grid-template-columns:1fr 200px;grid-column-gap:20px;align-items:flex-start}.blog-item-content-wrapper section{min-height:unset!important}}.blog-item-content-wrapper .content-wrapper{padding:0px!important}
</style>
#2. Usage
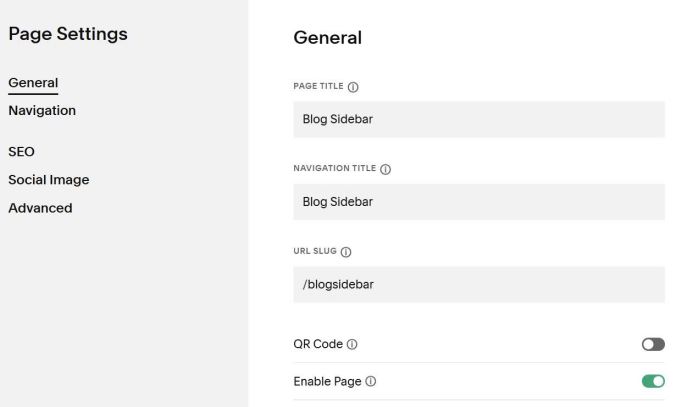
First, you need to create a Page in Not Linked with
- Name: Blog Sidebar
- URL: /blogsidebar
Add a Section

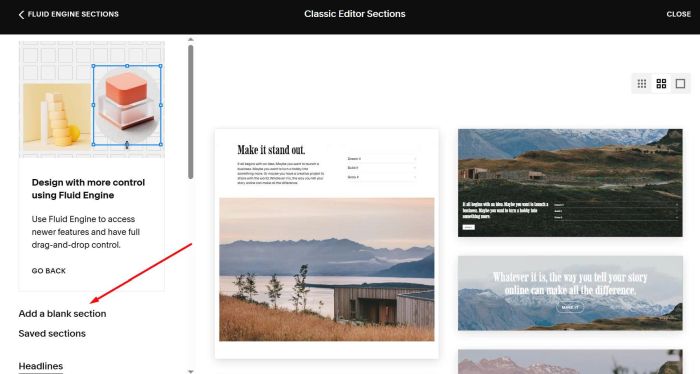
You need to choose Classic Editor Section
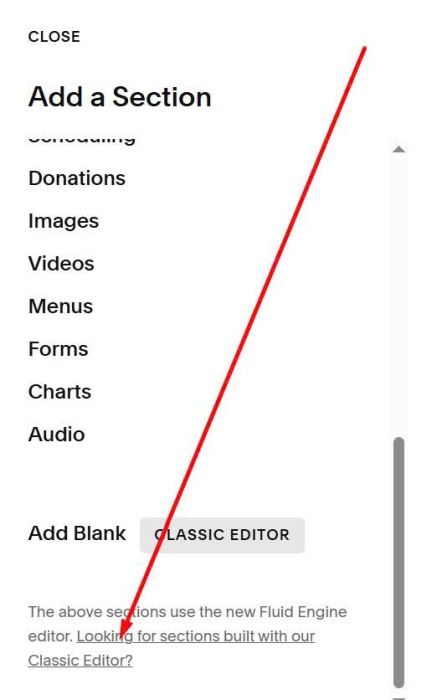
Then add a blank section (or choose built-in sections)
Next, add your desired blocks, here I added a Text Block
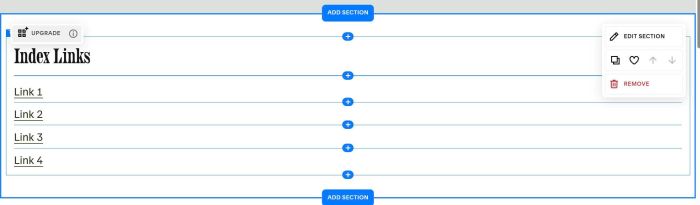
Next, hover on top right of section > Click Edit Section
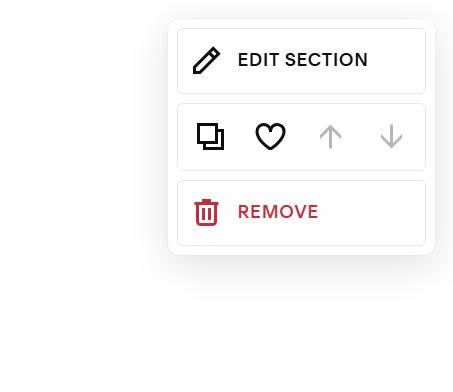
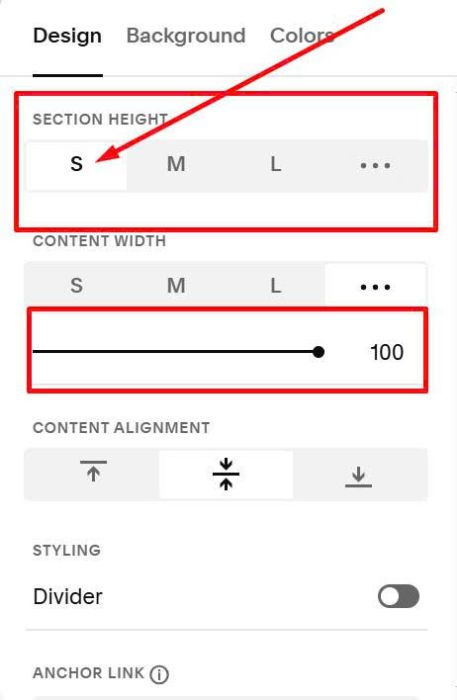
Choose 100% width + Height: S
#3. Customize
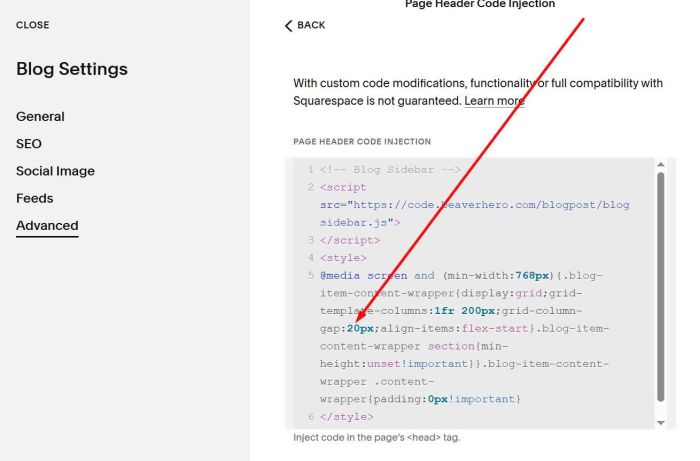
#3.1. To change Sidebar Width, you can adjust this value
#3.2. To change space between Blog Content – Sidebar, adjust this value.
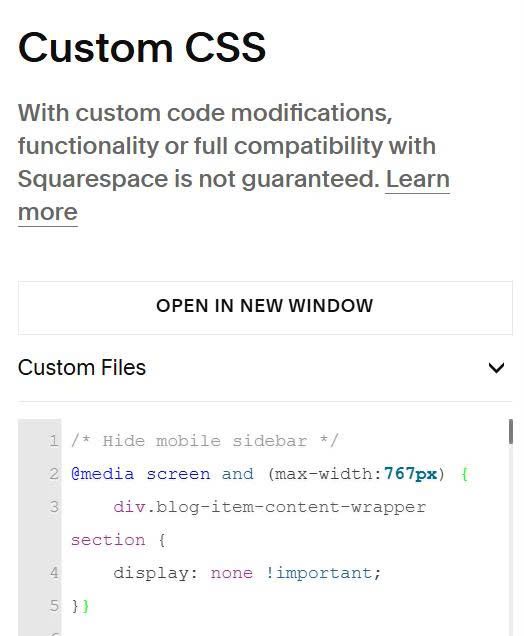
#3.3. To hide Sidebar on Mobile, you can use this code to Custom CSS.
/* Hide mobile sidebar */
@media screen and (max-width:767px) {
    div.blog-item-content-wrapper section {
    display: none !important;
}}